!!! Ubuntu 인스톨러 진입, 설치후 진입 등 OS 부팅 진입시 nouveau(Open Source Driver for Nvidia VGA) 호환 문제로 화면이 나오지 않거나 Hang 상태로 진행이 안될 경우 아래 참고 !!!
https://testtube.tistory.com/7
[CentOS 7] Nvidia VGA Black Screen Issue Troubleshooting
### CentOS 설치전 확인사항 ### EFI 시스템의 경우 CMOS의 Secure Boot Option 항목에서 Secure boot key를 Clear(혹은 Delete)하여 Secure Boot를 Disable 시킨다.(Secure Boot이 Enable 상태일 경우 드라이버 설치시 nvidia-drm
testtube.tistory.com
!!! EFI 시스템의 경우 CMOS 에서 Secure Boot Option이 Disabled 상태인지 미리 확인할 것(OS 설치전 미리 조치해두는게 여러모로 편함) !!!
1. Disable nouveau
# sudo vi /etc/modprobe.d/blacklist-nvidia-nouveau.conf
blacklist nouveau
options nouveau modeset=0
저장
# sudo update-initramfs -u리부팅
2. Install Nvidia Driver from ppa
# sudo apt-get install linux-headers-$(uname -r) dkms

# sudo dpkg --add-architecture i386
# sudo add-apt-repository ppa:graphics-drivers/ppa

# sudo apt update

# sudo apt install libc6:i386

# sudo apt install build-essential libglvnd-dev pkg-config

# sudo ubuntu-drivers devices
# sudo ubuntu-drivers autoinstall (혹은 sudo apt install nvidia-driver-520)
리부팅
3. Install CUDA Toolkit
# sudo apt-get install gcc g++ freeglut3 freeglut3-dev build-essential libx11-dev libxmu-dev libxi-dev
# sudo apt-get install libglu1-mesa libglu1-mesa-dev libfreeimage3 libfreeimage-dev libxcb-xinput-dev
CUDA Toolkit 11.5 Update 1 Downloads
Resources CUDA Documentation/Release NotesMacOS Tools Training Sample Code Forums Archive of Previous CUDA Releases FAQ Open Source PackagesSubmit a Bug
developer.nvidia.com
# cd /home/userid/Downloads/
  (로컬유저 계정의 권한이 부여된 디렉토리로 이동, 혹은 기타 지정 디렉토리에서 맨 앞에 sudo 붙이면 설치 파일 다운로드 및 파일 권한 조정이 가능하니 선택적으로...)

# wget https://developer.download.nvidia.com/compute/cuda/11.5.1/local_installers/cuda_11.5.1_495.29.05_linux.run

# chmod 744 cuda_11.5.1_495.29.05_linux.run
# sudo ./cuda_11.5.1_495.29.05_linux.run


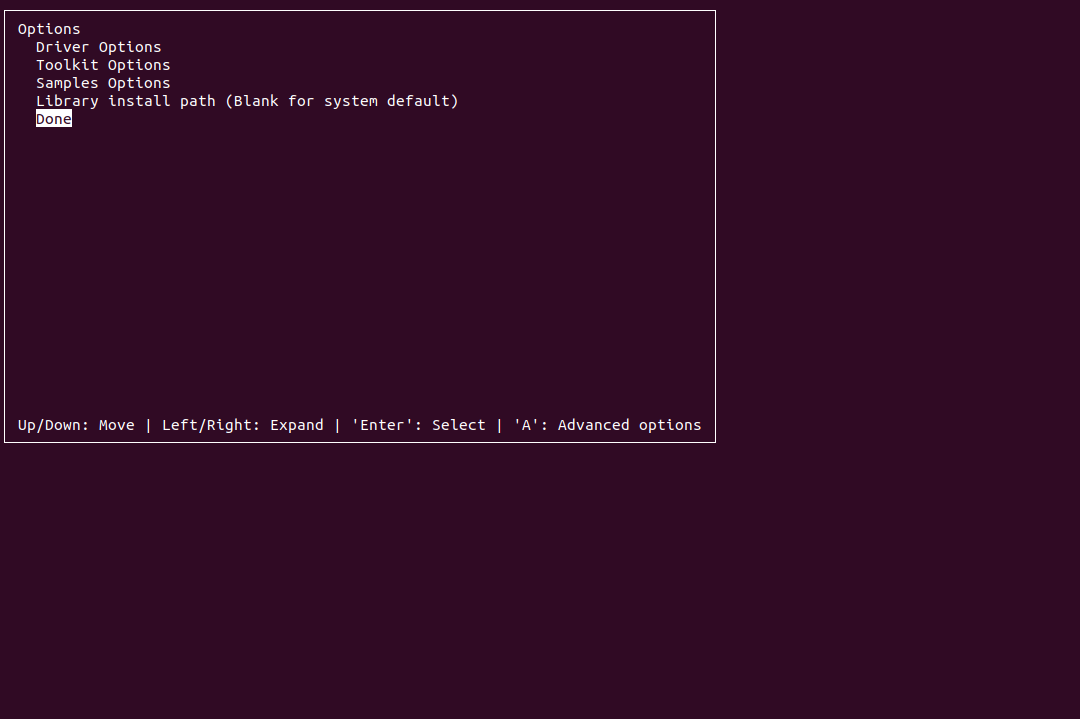

설치과정 완료되면 아래와 같이 Summary를 보여주고 /var/log/cuda-installer.log에서 설치 과정 로그를 확인 할 수 있다.
(일반적으로 /usr/local/cuda-<version>/의 경로는 /usr/local/cuda/로 링크가 만들어지니 참고하자.)
===========
= Summary =
===========

Driver:   Not Selected
Toolkit:  Installed in /usr/local/cuda-11.5/
Samples:  Installed in /home/userid/cuda/

Please make sure that
 -   PATH includes /usr/local/cuda-11.5/bin
 -   LD_LIBRARY_PATH includes /usr/local/cuda-11.5/lib64, or, add /usr/local/cuda-11.5/lib64 to /etc/ld.so.conf and run ldconfig as root

To uninstall the CUDA Toolkit, run cuda-uninstaller in /usr/local/cuda-11.5/bin
***WARNING: Incomplete installation! This installation did not install the CUDA Driver. A driver of version at least 495.00 is required for CUDA 11.5 functionality to work.
To install the driver using this installer, run the following command, replacing <CudaInstaller> with the name of this run file:
    sudo <CudaInstaller>.run --silent --driver

Logfile is /var/log/cuda-installer.log
# sudo vi /etc/profile.d/cuda.sh
export CUDADIR=/usr/local/cuda
export PATH=$PATH:$CUDADIR/bin
저장
# source /etc/profile.d/cuda.sh
# sudo vi /etc/ld.so.conf.d/cuda.conf
/usr/local/cuda/lib64
/usr/local/cuda/extras/CUPTI/lib64
저장
# sudo ldconfig
4. Install cuDNN
https://developer.nvidia.com/cudnn
NVIDIA cuDNN
NVIDIA cuDNN The NVIDIA CUDA® Deep Neural Network library (cuDNN) is a GPU-accelerated library of primitives for deep neural networks. cuDNN provides highly tuned implementations for standard routines such as forward and backward convolution, pooling, nor
developer.nvidia.com
Download cuDNN 선택하여 다운로드(Nvidia 계정 필요함)하고, 다운로드 완료후 터미널 실행하여 다운로드 받은 디렉토리로 이동
# sudo apt-get install zlib1g

# tar -xvf cudnn-linux-x86_64-8.3.2.44_cuda11.5-archive.tar.xz

# sudo cp cudnn-*-archive/include/cudnn*.h /usr/local/cuda/include
# sudo cp -P cudnn-*-archive/lib/libcudnn* /usr/local/cuda/lib64
# sudo chmod a+r /usr/local/cuda/include/cudnn*.h /usr/local/cuda/lib64/libcudnn*

# sudo ldconfig
※ Nvidia Driver & CUDA Toolkit 삭제(cuDNN 포함)
# sudo /usr/local/cuda/bin/cuda-uninstaller(모든 항목 선택하고 Done 선택후 Enter)
# sudo \rm -rf /usr/local/cuda
# sudo \rm -rf /usr/local/cuda-<version>
# sudo \rm -rf /home/userid/cuda/
# sudo \rm -rf /var/log/cuda-installer.log
# sudo \rm -rf /etc/ld.so.conf.d/cuda.conf
# sudo \rm -rf /etc/profile.d/cuda.sh
# sudo apt-get remove --purge nvidia-*
# sudo apt-get autoremove
# sudo apt-get autoclean
# sudo apt update
# sudo apt upgrade
참고:
https://docs.nvidia.com/cuda/archive/11.5.1/cuda-installation-guide-linux/
Installation Guide Linux :: CUDA Toolkit Documentation
Check that the device files/dev/nvidia* exist and have the correct (0666) file permissions. These files are used by the CUDA Driver to communicate with the kernel-mode portion of the NVIDIA Driver. Applications that use the NVIDIA driver, such as a CUDA ap
docs.nvidia.com
https://docs.nvidia.com/deeplearning/cudnn/install-guide/
Installation Guide :: NVIDIA Deep Learning cuDNN Documentation
About this task export QNX_HOST={flash_dir}/toolchains/qnx_toolchain/host/linux/x86_64 export QNX_TARGET={flash_dir}/toolchains/qnx_toolchain/target/qnx7 export HOST_COMPILER=$QNX_HOST/usr/bin/aarch64-unknown-nto-qnx7.1.0-g++ export CUDNN_LIB_PATH=/usr/lib
docs.nvidia.com
'OS > Linux' 카테고리의 다른 글
| [Ubuntu 18.04] Steam Installation (0) | 2020.04.21 |
|---|---|
| [Ubuntu 18.04] Adobe Flash Player Installation (0) | 2020.04.21 |
| [Ubuntu 18.04] OpenJDK 8 Installation (0) | 2020.04.21 |
| [CentOS 7] PHP 설치(APM, Source Compile) (0) | 2020.04.06 |
| [CentOS 7] Apache HTTP Server/Tomcat 연동(mod_jk, Source Compile) (0) | 2020.04.04 |